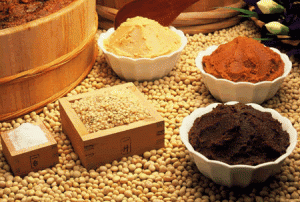
Miso is one of the great non-dairy sources of probiotics. In major cities you can usually find it in the refrigerator section of a good health food store. (I do not recommend unrefrigerated miso which may be a flavored bean product without probiotic benefits.) However you can make it yourself and you can use beans other than soy if you have allergies, and you can ensure a non-gluten koji starter (rice rather than barley koji). Incidentally, soy is considerably less harmful when fermented.

Things You’ll Need:
- 2 cups of beans
- 4-6 cups of water
- Pressure cooker
- Colander
- Potato masher
- 1 1/2 cups koji rice
- 8 tbs. of salt
- Cylindrical 2-3 qt tupperware container or a miso crock.
- Plastic gloves to keep miso sterile
Time:

- 10 hours to soak soy beans
- 2 hours to boil
- 2-6 month to ferment (the younger the milder the taste.)
1) Lightly wash 2 cups soy beans, garbanzo beans, chana dal, black beans or other beans and place in a large glass measuring cup or bowl.
2) Cover with 4 times the volume of water. Soak beans for 8-12 hours.

3) Add the soaked beans with the water into a pressure cooker. Cook the beans for 40 minutes until they are softened. Alternatively cook the beans in a covered pot for 2 hours, reducing the heat after they come to a boil. When done, the beans should be able to be pinched and crushed between your thumb and baby finger.

4) Drain the beans into a bowl by using a colander while hot, reserving half of the drained water

5) Mash the beans into a paste. You can use a blender, potato ricer or put the beans into a strong plastic bag and crush by hand while still hot.
6) Cool to room temperature before adding the koji. The koji is a live miso starter so too much heat can kill it. Koji can be found online or in the macrobiotics section of a good health food store.

7) Dissolve 6 TBSP sea salt in one cup of reserved water, and set aside two teaspoons of the salt for later. Stir the salt water mixture into the mashed beans, adding more as needed.
8) Sprinkle 1 1/2 cups koji rice onto the miso. Mix everything with your hands until the texture becomes smooth and there is no air in the miso ball.

9) Sprinkle a 2 quart tupperware container or a round miso crock with one tablespoon of the salt. Push the miso into the container and flatten with your hands, making sure there is no air. (You can also salt a plastic bag, fill with miso and salt it, then press out all of the air and tie closed.)
10) Salt the surface of the miso to prevent molding.
11) Cover the miso in the bowl or crock with plastic wrap or parchment, and press out all of the air. Fill the area above the plastic wrap with a dry cloth towel, weighted down with a few clean stones. You do not want air in the bean mixture or it will oxidize and turn black.

12) If you are using the crock, take a piece of plain wrapping paper or parchment and tie the top of the crock closed then place the lid over it. Or just cover the tupperware container with its lid and burp for air.
13) Place in a dark place about 25 degrees C (75 degrees F) to ferment. Label and date the container.

White Miso is ready in 2 months. If you prefer the stronger flavor of red miso, keep covered 6 months. Open and refrigerate.
In the Autumn you can use somewhat less salt. In the summer, salt levels are necessary to prevent molding. If the mixture molds, discard it and try again with as much sterility as possible.
And here is a British video on how to make your miso into soup, although you can just stir it into warm water. Note that “nought” means zero:
Cheap Recipes: How To Make Miso Soup
More recipes at the Mitoku miso web site.
Article in Japanese on how to make miso: saikikoujiya.com/tedukuri.html#howto
